PICTURES OF SELF-MADE C CONTACT TRACKS
Click on the the small picture below to see large pictures. Click on any large picture to return to this screen.

S
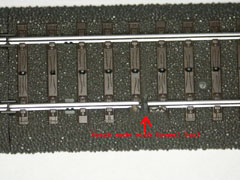
everal pictures of C contact tracks which I made using two different method. The first involves two C track sections while the second, which is more useful, uses only a single C track section.The first set of instructions for making contact tracks from any two C tracks is explained with pictures. You cut a notch with a Dremel Tool disc in the outside rail of two C tracks or the same or different lengths or radii. (A Dremel tool is a rotary device to which you can connect a variety of small tools, i.e., sanding/cutting discs, grinding tools, small drills.) I hot glued the outside rails to be sure that they would not move after making the cut.
On the under side of the two track pieces I found the bridge that connects the outside rails. There is a bridge at each end of the track. Again, using a Dremel Tool disc I cut the four bridges for the outside rails or tracks.
Rather than use a wire with a spade or soldering a wire to a connector, I slipped the bare end of a wire between the "tongue" for the outside rail on the notched side of the track and the plastic part of the connector. I then connected the two tracks with the notches on the same side. The bare wire protruded above the track bed. I then bent the protrudin wire down against the track bed. You can shorten this protruding wire if you wish but I left it long. It is hardly visible. This method saved buying the spades and avoids soldering the rail connectors which could result in melted plastic and mis-aligned tracks.
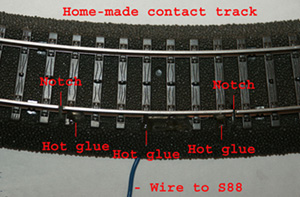
I have also made contact tracks out of single C tracks, any length and any shape. I hot glue the outer rail, which is very important any lenght of track but especially on short track sections, and then I cut two notches on the same outer rail with a Dremel tool. Then I make a notch on the underside of the track under the same outside rail. I insert the bare end of a wire into this notch. I press the wire into the slot or notch to ensure good contact and then hot glue it. This is actually easier to do then the first method and works just as well. This second method allows greater flexibility on a layout.
You should test the notched sections for isolation and the wires to the S88 for conductivity in either method.